Showing posts with label Cuttlebug. Show all posts

Wednesday, October 19, 2011

Hello Everyone!


I miss my blog, a recent visit to another local crafters blog (http://www.saving4six.blogspot.com/) got my blog envy juices flowing again...if that even make sense.

Several months ago, one of my long time friends announced that she was pregnant with a little girl! I made her this card and some fun stuff for her scrapbook on my cricut.


I took these photos, and just recently (after I already mailed her baby shower gift) found the card and the fun scrapbook goodies sitting on my table. So, I am posting the photos here and getting them out in the mail - ASAP before the baby is here in a couple weeks!!


I love this card style. I can not remember where I saw it originally but I have made several cards using this type of layout.


The bottom of the card was embossed with my cricut using a folder by Darce. Then I colored over the raised embossed lines, applied glue and then glitter. The stamp set was a set by the Angel Company called Special Delivery. I colored the images with Tria Pantone and Prismacolor markers. Very carefully I used an exacto knife and cut a few slits long the image lines so that I could attach the ribbon to make it look like it is the blanket wrapped around the baby.


Because its been a few months since I made the card I do not remember all the details of marker colors etc.


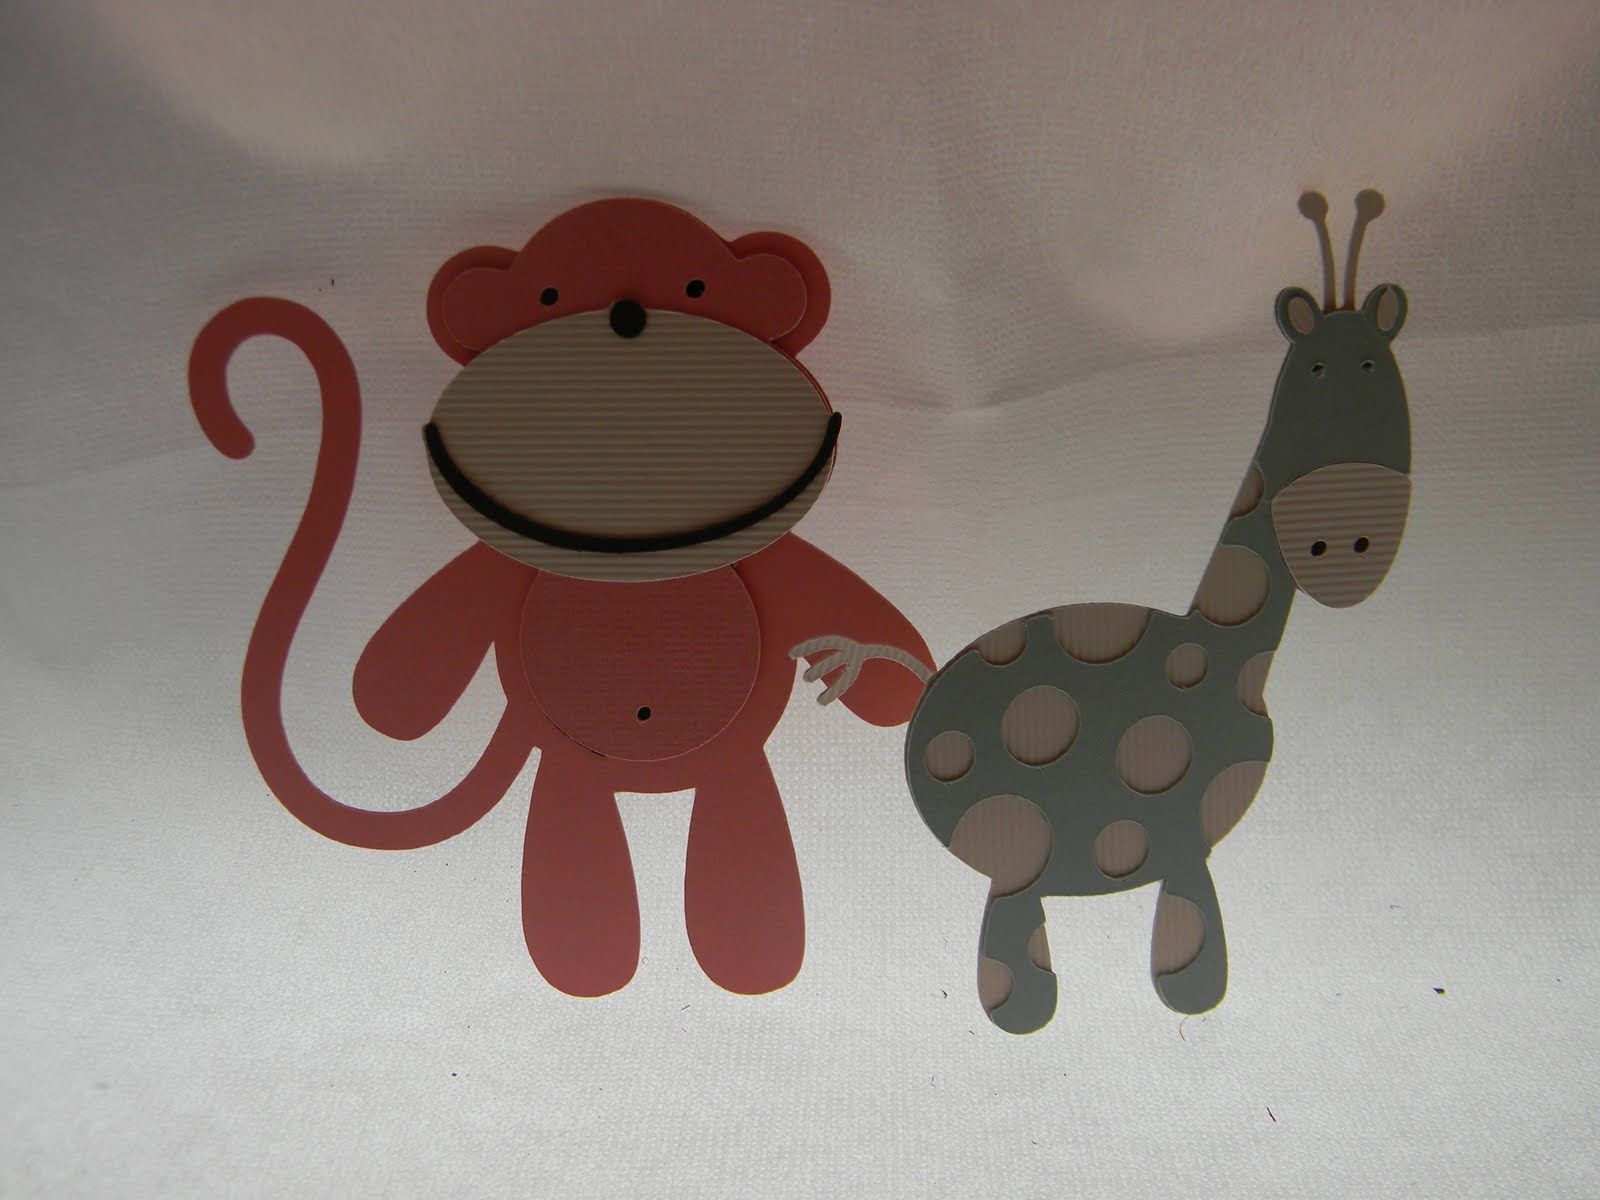
Below are the fun items I cut using my Cruit and my SCAL software!


Thanks for stopping in again and hopefully it wont be 6 more months before I post again!

Tuesday, September 07, 2010

Happy Waiting

A friend of mine found out she was pregnant over the weekend - with a situation similar to mine she was told she wasn't but knew something wasn't right. I am glad now she knows :)


I love when I know the stamp I want and find the right piece of paper. Once that was decided (which only took seconds) the rest of the card fell into place. This is the card that I made her; I was very happy with the turn out.

I really like how I was able to paper piece the dress and purse together on this card. To give it some demention I did use my markers to shade the dress and purse along with the rest of the outfit.

I finally got my Nestibilities to work in the cuttlebug and I see myself using that A LOT!! It adds such a nice finishing touch. I am so happy to be back in studio - no more dust on my stamps!

Images: TAC How Swell, Words: SU Swell News Cardstock/Paper: barely banana, mellow moss, white, printed paper given to me in a Wish RAK Ink: Palette Noir, Charcoal Markers: Prismacolor Cinnamon toast and Green Tea Tria Pantone blender, Gray 1 489T and 475T Accessories: organza ribbon, pop dots, cuttlebug dot embossing folder, Nestibilities Rectangles, Martha Stewart lace punch, Prima Flower, Seed bead, Clearstar Jellyroll pen Techinques: layers, paper piecing, coloring


Thursday, June 03, 2010

My first Betty Boop card!


I was rather excited by last weeks challenges on SCS.

Here they are:
Monday: Try a New Technique TLC274 That Old Black Magic
Tuesday: Color Combination CC272 Real Bermuda Krafts
Wednesday: Sketch Callenge SC281
Thursday: Ways to Use it WT272 Paint
Friday: Free For All F4A14 Inspired by a Collection

Click here to see the challenge thread!

On this card I used the cuttlebug to create the circular background. Then I used the the SU white craft pad to ink the raised areas. I colored the interior of the circles with the aqua colored watercolor pencil then I went around the exterior of the circles with the red watercolor pencil. One of the challenges was to use paint so I pulled out my pearlex paints using a blue with the aqua watercolor pencil and using red and gold with the red watercolor pencil. I used the gold to bring out the gold in the dirt in the main photo and the gold on the Kraft colored cardstock.


I used Black cardstock for the main card and the embossed layer - the layer inbetween is White cardstock.

The two larger sections are layered opposite of each other in real red and bermuda bay. The Betty Boop image is coloring book image I found online. I shrunk it to fit the card. I colored this with Tria Pantone and Primsma color markers. Then I took the crayola True to Life colored pencils and used it over the background and then brough in the pearlex paint as well. The black dots are stickles.


Images: Betty Boop (coloring book)
Cardstock/Paper: black, red, Bermuda bay, Kraft, white
Ink: Palette Rouge, Tria and Prismacolor markers
Accessories: stickles, pop dots, creative memories cutting system, cuttlebug
Techinques: layers, sponging, watercolor pencil, painting

Sunday, February 14, 2010

Wow! It's seems like it has been forever - but I have been stamping and enjoying it when I can. I have made some cards that I will show you today. Enjoy!


This is a quick little birthday card that I made fro Grace's friend. The little girl loves pink so I used as much as I could for her. I also used a CB embossing folder for the background.


This is a baby shower card that I made with the inside showing as well. I used Tria Pantone and Prismacolor markers. I am really starting to enjoy using these markers again. I hope to learn more coloring techniques so that I will have great coloring options.


This is Grace's Birthday card - I used the Tria Pantone and the prismacolor markers. This card is also built up in layers. I took a coloring book image, shrank it, make more copies so that I could layer the card. All the dwarfs beards are done with liquid applique.


This was Madelyns Birthday card - done the same was as Grace's. I love spending time on these - my girls enjoy getting them from me!
Thanks for stopping by and I hope to be here again real soon!


Friday, March 20, 2009

I got to Stamp!!
Yesterday I sat down to make Matt an anniversary card for today! It wasn't my best first attempt but he seemed to like the card! We have been married 5 years today!

This card is a 5x5 card. I used the Mr&Mrs set from Inkadinkados that I found at the Flower Factory. I used my cuttlebug to emboss the vellum and used some mono adheasive to mount to the card. It is a pretty simple card - I try not to over to cards for Matt as he always tells me I put way too much time into these cards.

Since I do not have 5x5 envelopes I told a regular 5x7 envelope after seeing a tutorial here - where I used my cuttlebug to punch hearts out of the envelope and the insterted a pieces of colored paper to seal off part of the envelope so that my card would fit nicely on one side. I think I like this better then trying to figure out how to make the envelope myself. Below is a photo of the card and envelope together:

Here are some recent photos of the girls - the babies - they are ever changing!

Sunday, March 02, 2008

A few more cards and stuff from the last few days...


I have been pretty busy the last few days and have not been able to post like I wanted to. Since I am starting my new job tody I wanted to make sure I had a lot of things done over the past week. On Saturday Madelyn and I went on a mini road trip. I had to go to Strongsville to pick up a piece of furniture, then since we were not too far away we rode over to Medina to hit up Hollos and Hobby Lobby.

Of course there was a detour and and then the signs just stopped so we drove around lost for an hour. Then we made it to Hollos where Madelyn realized that I was not lying when I told her it was an awesome paperstore! If you do not know, Hollos is a place where you pay $1 per pound of paper. Madelyn got about 3 pounds of paper and was in heaven. I picked up about 10 lbs of paper and now my paper rack is pretty full!

Then I found some really neat red glitterbased cardstock and some 12x12 glossy paper in light pink and blue. Then I found some metallic paper in red and reflective mirror paper! I can not wait to try them all out.

I also made another reflective card with a snowman! I used this card for inspiration. I just changed the colors to blue since its my favorite color. This was my second attempt at the reflection. I first used colored pencil but when I embossed it to give it a icy look the colors looked aweful. In this one I used watercolor pencils and CrystalLacquer, it distorted the colors a little, but not bad.
The background is embossed with my Cuttlebug and a Fiskars embossing plate.

Then I decided to do one of the challenges for the week from SCS. I enjoy doing these when I find time to do them. This challenge was the Sketch Challenge, click here, for the directions. I used a House Mouse stamp for this card. I also saw that some of the House Mouse stamps are now clear unmounted stamps at Hobby Lobby...I believe they were christmas and halloween! The mouse here is also flocked.

Lastly, before I post my last card from this past week. I am very tired from my first day back to work. Not to sure if it is the lack of sleep from last night (I was kinda anxious about today).
Or from being bored today. My new job entails my dept to keep forclosed properties maintained. Its a pretty basic job, but it keeps me busy. I will learn some more proceedures. I was told today that there may be a good chance to be hired on full time. I even heard that some people work from home doing what I would be doing. That would be a great thing!

Now, for my last card. I did yet another reflection card using the TAC set How Swell, I used the mirror reflective paper that I got at Hollos. I colored her with Prismacolor and Tria Pantone markers. I wish that I could have gotten a darker, more solid color from coloring on the reflective paper.

Tuesday, February 26, 2008

Reflective Remembering


I made this card this evening as it was a technique that I have wanted to try for some time. (Directions located here.)

Basically, I stamped my main image (TAC set Precious Girl) on a piece of watercolor paper, then again on a piece of parchment paper. After I stamped that image I placed it in the location that I wanted and brayerd the image onto the watercolor paper.

I then used a Zig pen (size .005) to add a little more detail (in this case I added a line where the water meets the ground and added a few extra blades of grass.) Once all of the pen work was complete I started water coloring. I used watercolor pencils (I have some from Prismacolor and Dewalt, both good sets). I used the the more concentrated colors on the top image and the diluted colors on the bottom image.

Both the brown piece of CS and the top layer of white are embossed with the cuttlebug. I rubbed the brown layer with the Palette Burnt Umber pad and the 2nd white later with the Toile Pink Palette Pad.

I really like how this turned out, it almost looks too plain looking, but I did not want to take from the watercoloring either. I'd like to try this again with more vibrant colors.

Monday, February 18, 2008

A Little of This, and a Little of That.....


I have been a litte busy this week....I have been focusing on finding a job even though I love being home with the girls, the checkbook does not love it so much.

I did have some time to play this week. Madelyn had another birthday party this past Sunday and I had to make another card.

I used a left over Pet Shop Valentine to create this card. I cut the horse out of the Valentine and adhere it too the card with a 3d-dot. I also used the TAC stamp sets Chicken Scratch and Wild West to complete this card.


Card details: Pink 2 CS (TAC), Beige (unknown vendor) and Chocolate Chip (SU) Cuttlebug EB folder (Squares). 3D-D0ts by EK. Versa Mark. Beige and Chocolate ribbon from Michaels. TAC stamp sets: Wild West and Chicken Scratch.


Then, I decided to do some glass etching. I received this glass coaster at a Wedding as a favor. I had been holding onto it until I figured what I could do to it. (besides use it for its purpose).

This is how I etched it (Directions based on a tutorial on SCS).

First I cleaned the surface with a glass cleaner. Then I measure the opening (the area I didn't want etched) and covered that area with a corresponding sized piece of contact paper. Once I inked my image (in this case, I used a TAC set Paisley Rockz), I carefully stamped it on the glass making sure that it did not slide. Then I poured Clear EP over the area and heated. I continued this process until the area was covered to my liking. Be careful, the glass will get hot and you may at time have to allow it to cool some before you move on.

After I had stamped all of my images and embossed, I poured Armour Etch cream over the areas I wanted etched. I used a sponge brush to spread out the cream. I kept it some what thick and covered well. Then I allowed the cream to sit for 5 minutes.

Once the time was us, I put n my kithen gloves and washed of the etching cream. It may take a bit of rubbing to get the Clear EP off the glass. Once it is all cleared off you will be able to see the etching in the glass.

Saturday, February 16, 2008

Swirly Heart's Wedding Invitation


I was playing around with some wedding invitation ideas that have been milling in my mind....This is a tri-fold card (9.25 x 4; finished size) with an insert. This insert has can be pulled out and ran through a printer with all the important wedding details. It has two hearts stamped in Almost Amethyst craft pad and embossed with clear EP. The heart is from the TAC set called Mini Sampler. The side flaps are embossed with the cuttlebug and is closed with ribbon. The heart is cut with the cuttlebug as well.

To make things easier, I cut 2 2"x9.25" and embossed those peices with the Swirly embossing folder. I then adheared those pieces to the fronts of the card and carefully cut the already cut heart out of the embossed pieces. There is a seam to where the embossing lines up so it is covered with the ribbon.

Friday, February 08, 2008

Never a dull moment....


Yesterday, my littlest, Grace (better known as Matt Jr.) told me while I was watching the dogs outside that she was going to come upstairs and play her computer game. So, I would keep calling up here while watching the dogs to make sure she wasn't getting into trouble. She kept assuring me that she was playing her Freddie Fish Game. Finally LG came in and Rhylie ran up the stairs in which I her Grace cry out.....so I ran up the stairs....guess who wasn't playing her Freddie Fish Game?? Yep! Matt Jr.!


This is what I found:


Today, my oldest had a birthday party to go to...and another party tomorrow. So, I needed to get out of this card funk that I have been in. Nothing seems to come out how I plan it....since my husband is suppose to be gone all finishing up his sqad time so I figured I would really work on some of these things that I needed to do...cards, scrapbook pages, projects etc. etc.


First I worked on some birthday cards. Both cards are for 7 yr old girls, and Madelyn decided pink, purple and princess was the route that I should take.

In this card, I used my cricut and my cuttlebug to make it. I also put glitter within the embossed circles which I thought helped with the white background not being so blah! I then stamped "there's a princess in every girl" on the inside in Claret ink. Here is what it look's like:


Card details: Pink 2 CS (TAC), White CS (TAC), Gray CS (unknown vendor) and Almost Amytheyst CS (SU). Cricut cartridge: Happily Ever After (princess crown). Cuttlebug EB folder (spots and dots). Martha Stewart ballpoint-tip glue pen. DecoArt Glamour Dust. 3D-D0ts by EK. Rhinestones (from Heather) and periwinkle and pink ribbon from Michaels. Disney Princess Sentiments set. Claret by Palette.