Showing posts with label diy. Show all posts

Friday, March 02, 2012

DIY sewing lables

I often sew things for my girls. I also have always thought it would be cute to have a handmade tag to go with it. I saw this on a blog here.  I created a little something in Microsoft Word. It has my initials LAC and over laying that says Stitched with Love along with the address to this blog. I got them to print on the reverse onto iron on transfer paper.
Once I decided on the length of the tag, (I used a white polyester ribbon for these) I cut a bunch of the ribbon along with the iron transfers. I cut theses as tight as I could to the image so that they fit the ribbon width that I had cut.
I iron the transfer to the right side of the ribbon.
This is what the tag would look like with the transfers on.
I took a new tag and sewed it into Grace's apron.

Thanks for stopping by :)


Pin It


Thursday, March 01, 2012

DIY Lightbox

I have been wanting some clearer, crisper images of the items that I posted on my blog. After searching on Pinterest I found directions to create my own light box for this purpose.

I came across this. I made my variation of it as you can see below:

 I started with a box I had laying around. I took my square rule and used that to mark off my openings. I hate measuring so I just laid the rule on the corner and two sides, traced the ruled, flipped the ruler and repeated. This gave me cut outs that each had the same width of box remaining on the edges.
 I then took some tongue depressors to reinforce the edges. I knew I would be putting weight on top of this box so I wanted to make sure it could hold the weight. I glued these on both sides of the cardboard.
 This I took some white muslin and lined both the inside and outside of the box. As you can see in the next photo you can see that I am not using a typical light source. When I went to Kent State, in their fashion design program, we were advised to have a light box for figure drawing. Once we mastered our figures we were able to use the base drawing with our light box so that we may draw clothing to the proper dimensions.


Below are a few pictures I snapped  - I love how clean they look with little background noise. 


Pin It


Friday, February 24, 2012

2 Upcycled Jean Purses and a Fairy Door

Pin from Pinterest

My version.

I saw this denim purse on Pinterest and had to make it! I loved the concept - up-cycling - turning something old into something new. My sister in law's birthday was around the corner so I made one for her. I used stencils, some fabric paint and some fun stitching on my machine. She really liked the purse and uses it often! Then, for Christmas I thought each of the girls would love one. The pictures below are the front and back of Dakota's purse. It's a modified version of original. On her purse there are beads, buttons, Disney princess ribbon, stenciling etc. Time did get the best of me and I was unable to finish the purses of the other girls. Once they are complete I will be sure to post them too.


When I saw this fairy door on Pinterest I immediately thought of my sister in law Mary. She loves faries and other whimsical type things. I knew I had to also make this for her for her Birthday. Go to Pinterest and see all the things that come up for fairy doors. There are a lot of great idea out of there.

In the picture below is my own version of the fairy door. I went outside and pulled bark off some chopped wood, found some branches that I could cut to size and in half. I had the fake moss from a previous project. I got the hinges from Pat Catans. The door base is Popsicle sticks that I glued together and stained. The Fairy stone is a fake pearl that I glued to the center and used black stickles over some puffed liquid applique. I really like the outcome - so did Mary!!

Pin It

Tuesday, February 21, 2012

Hair Bows

All little girls need bows for their hair. When you have 4 little girls like I do you start to wish you learned how to make these bows a lot sooner since they are so stinking expensive at the store, or poorly made and fall apart, or hurt their little heads. So I got a ton of inspiration from Pinterest, here is my board.


By following some pretty simple instructions found on the MANY blogs/websites/YouTube out there in the virtual world and burning my fingers with a lot of hot glue I was able to come up with some pretty cute bows that the girls, Brooke and Dakota especially LOVE.

Some things I have learned - Gator clips are great for all four of my girls hair and stay in well. They work great when I use the corkscrew pom poms with their ponytails. My girls range from having thick wavy hair, fine hair, or very little, 'newish' hair - Dakota does not have a lot of hair, but her hair is very short, fine and wavy.

Also, by covering the gator clips with ribbon (I'll post a pic when I make the next set of bows and link back here; I have a two more valentine's bows to finish up - even if its already past V-day) so that the metal gator clips do not just slip out of their hair.

Using the spring barrettes to make the loopy bows (St. Patties Day bow above) are harder to do when you are using a smaller barrette but still worth it if you have the patience.

The pink bow is using a fatter ribbon, I would not suggest this for the little gator clips as it looks to bulky.

The periwinkle bow is the twins favorite bow and can be worn with most any type of outfit - I need to make a lot more of these. Madelyn, who is 11, also finds these to be fun to put in her hair.

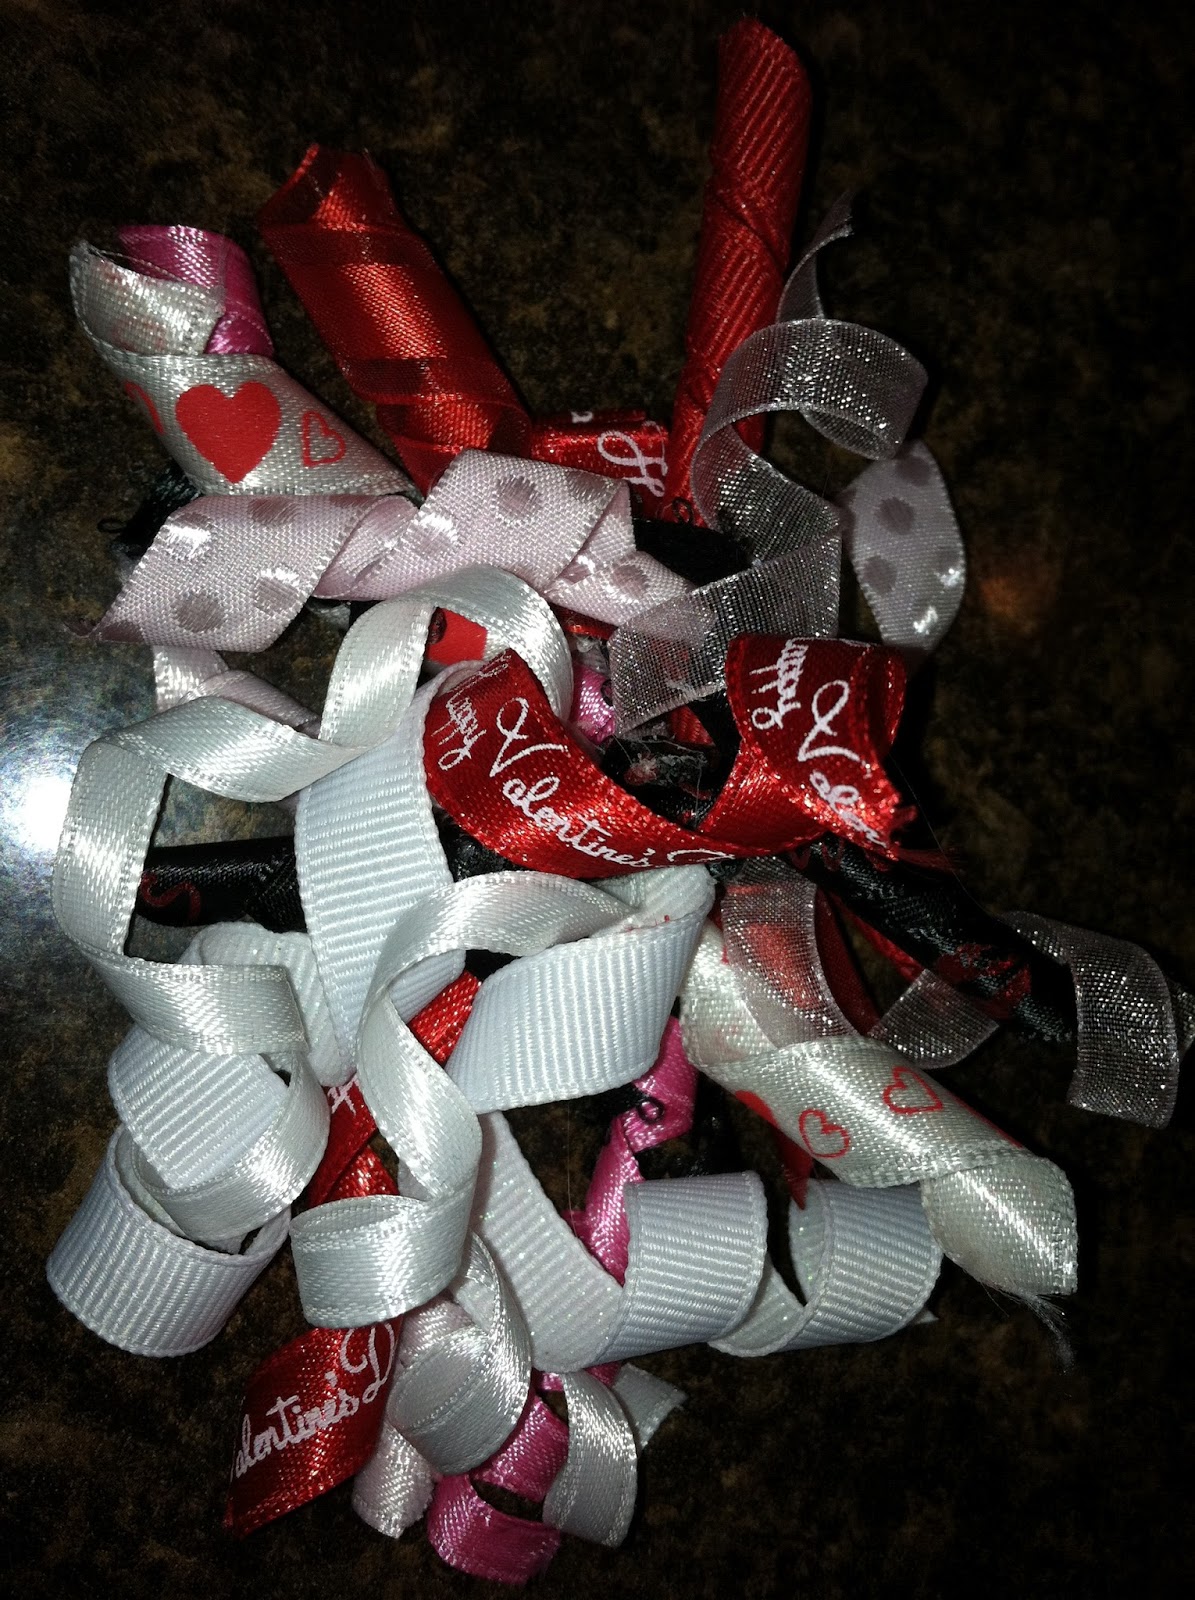
Lastly, hotglue is not my friend when it comes to make corker bows. The easiest way I found to make these were to take cut to size corker ribbons and run a needle and ribbon through the center of each, pull tight, wrap and knot. Cover the gator clip with a coordinating ribbon and hot clue to clip. These are a lot of fun - and less painful on my fingers!

On my list of projects is a hair ribbon holder - I love this one:
Found Here!